Synology DSM 6
An alternative up-to-date tutorial from third-party is here.
This tutorial is based on latest DSM v6 and v7.
After DSM 7.2 update, the Docker is upgraded to new “Container Manager”, please check this article instead.
Install Docker
| Open Package Center | Install Docker |
|---|---|
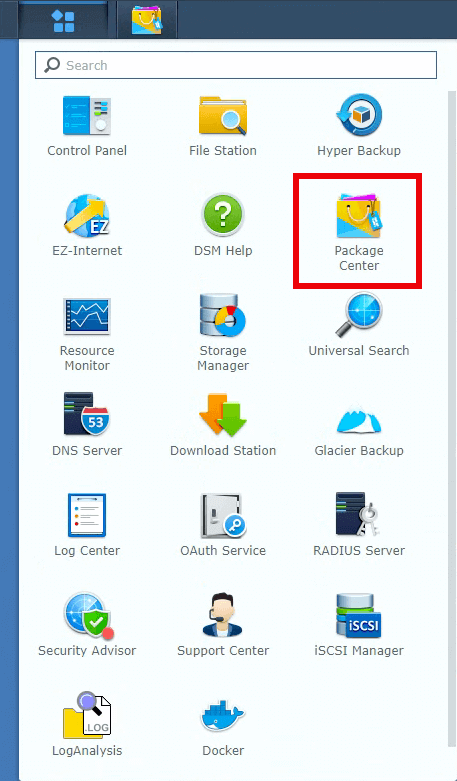 | 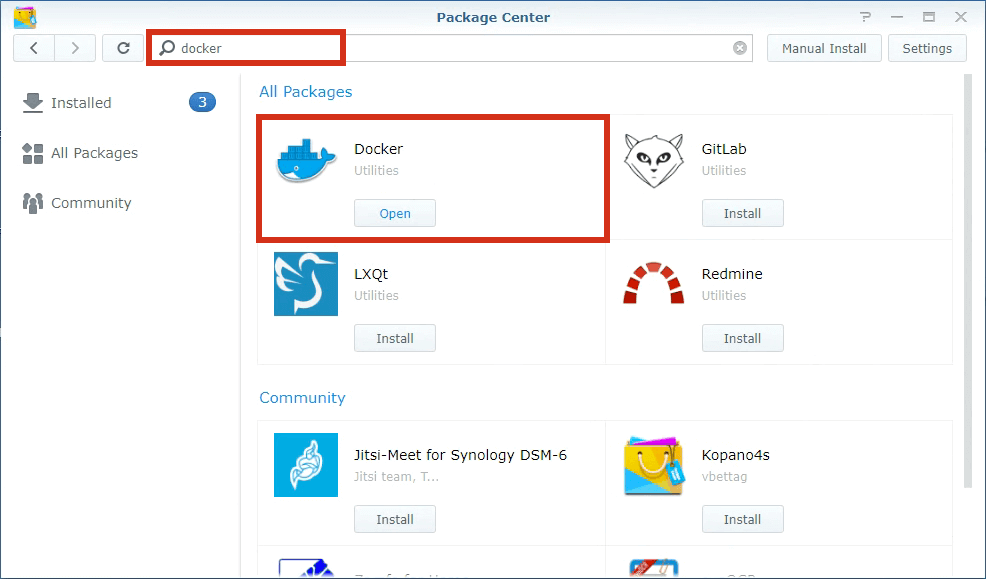 |
Install RustDesk Server
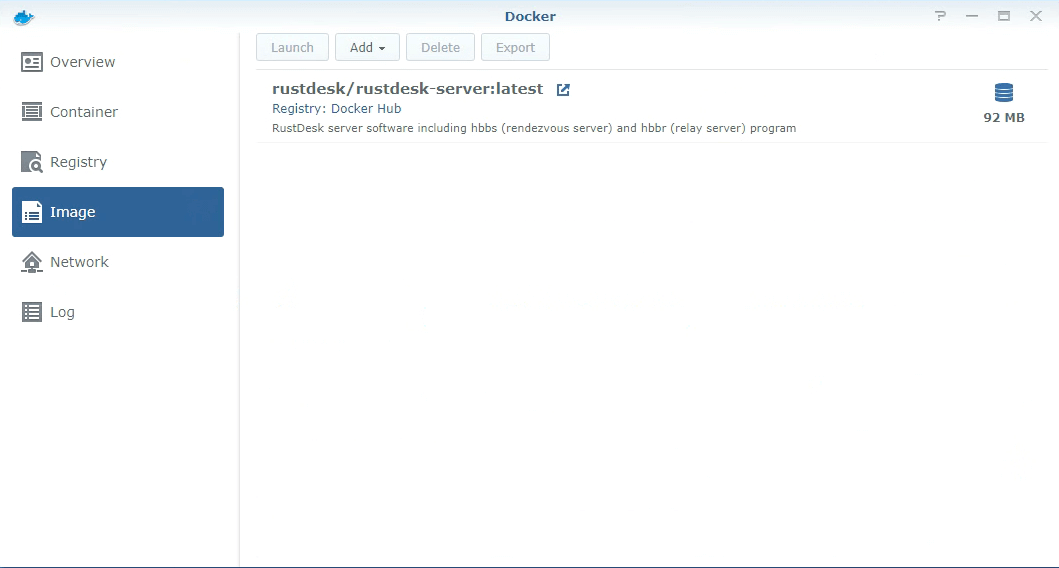
| Search rustdesk-server in Docker’s registry and install by double click | Installed rustdesk-server image, double click to create rustdesk-server container |
|---|---|
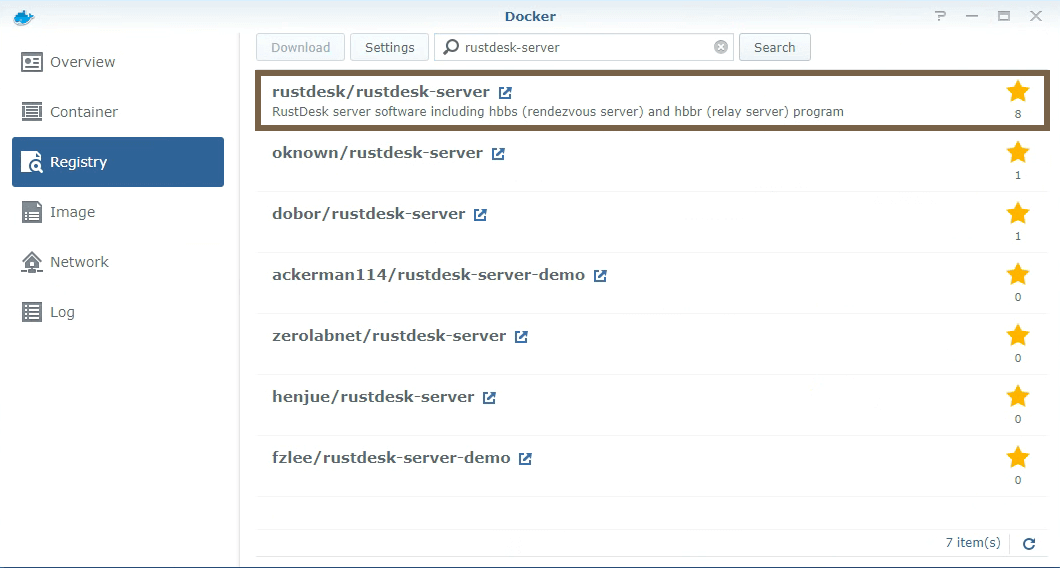 |  |
Create hbbs container
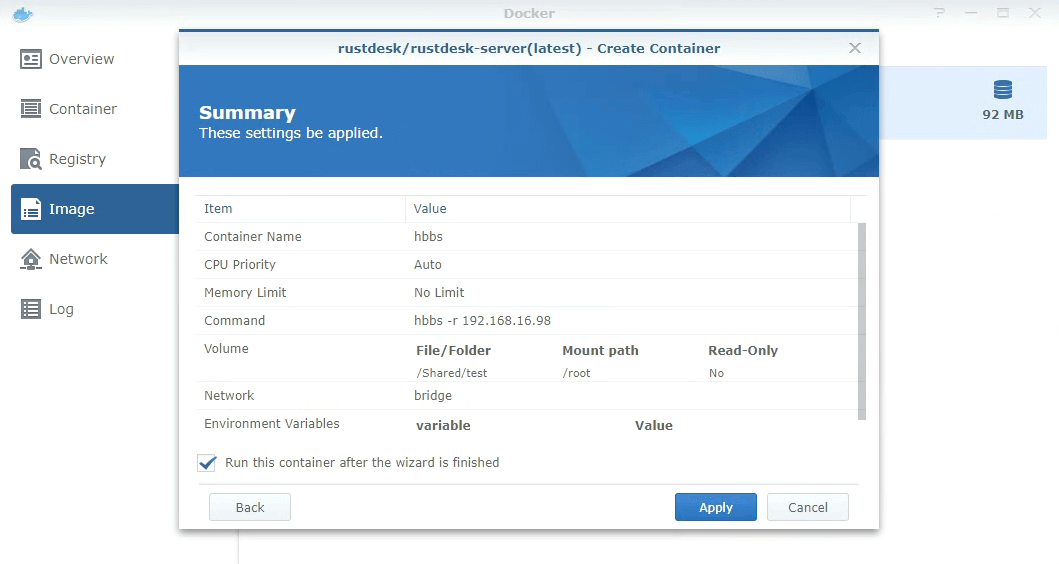
As mentioned above, double click on rustdesk-server image to create new container, set it name to hbbs.

Click on above Advanced Settings.
Enable
Enable auto-restart.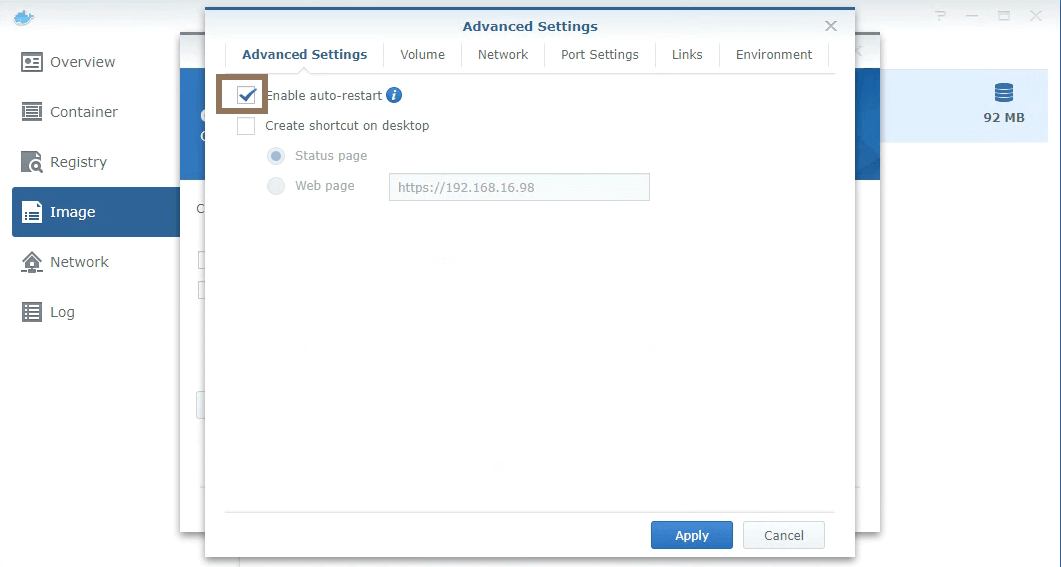
Enable
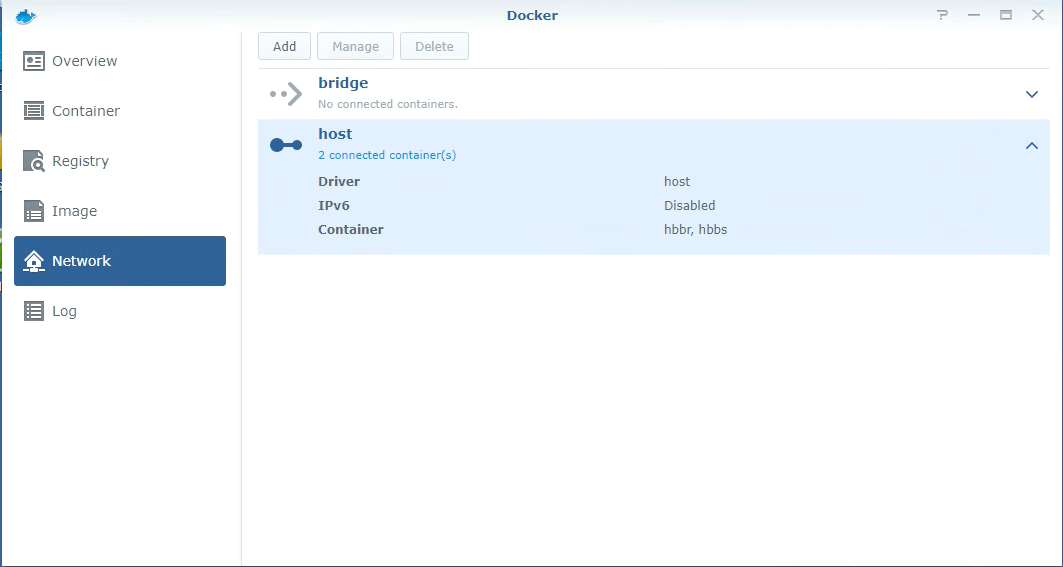
Use the same network as Docker Host. For more about host net, please check.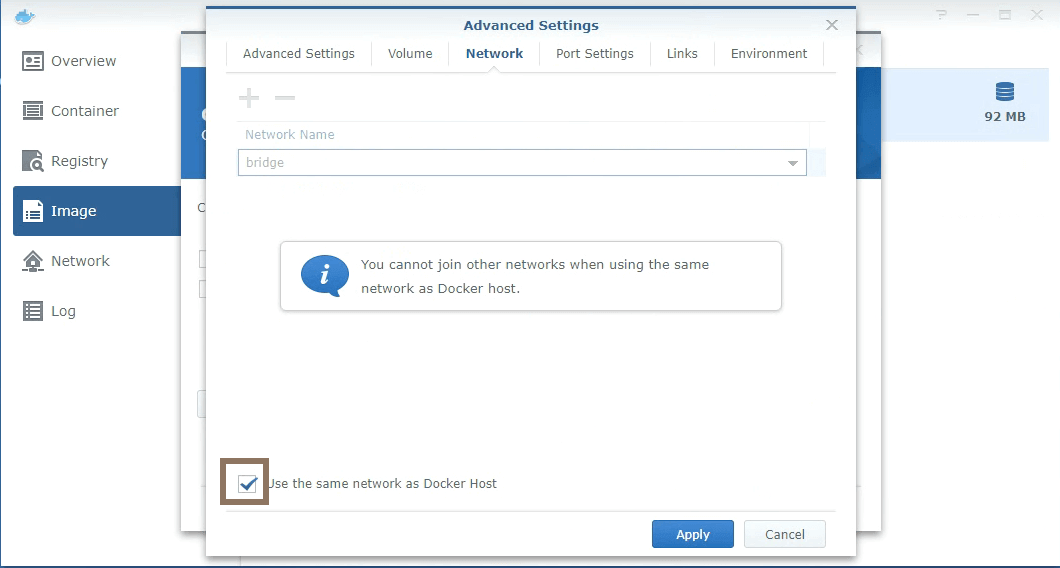
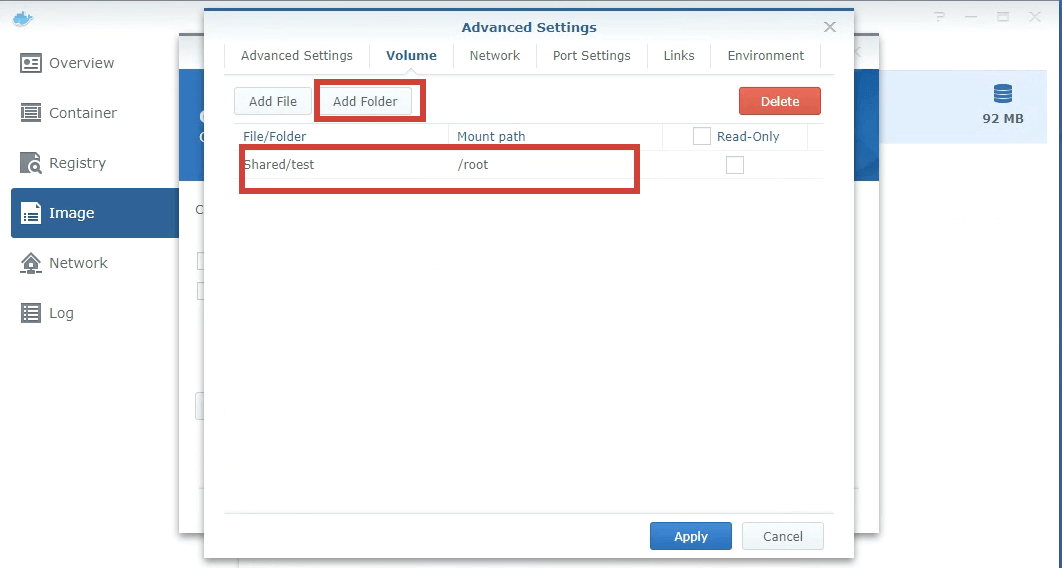
Mount a host directory (e.g.
/home/rustdesk/) to/root, hbbs will generate some files (database andkeyfiles) in this directory which need to be persistent over reboots.
| Mount | Files generated in the host directory |
|---|---|
 | 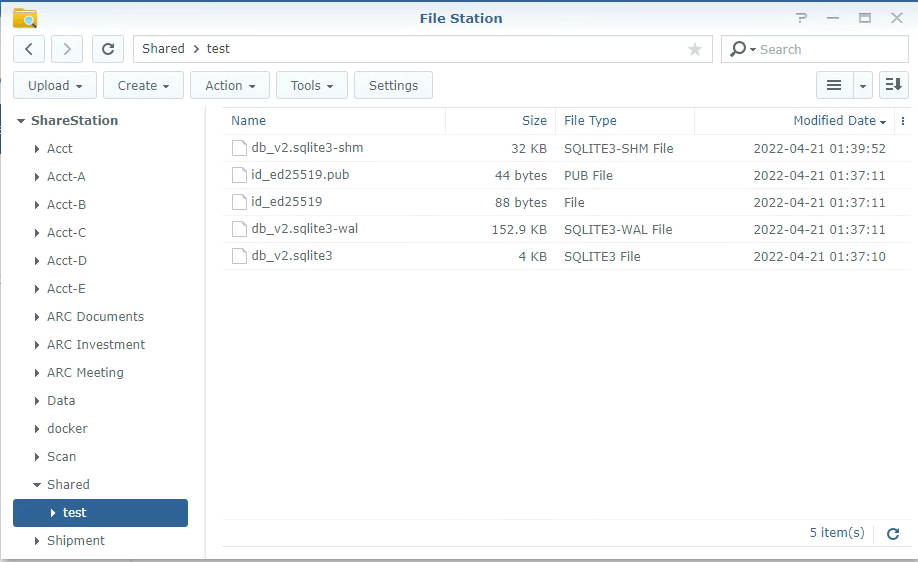 |
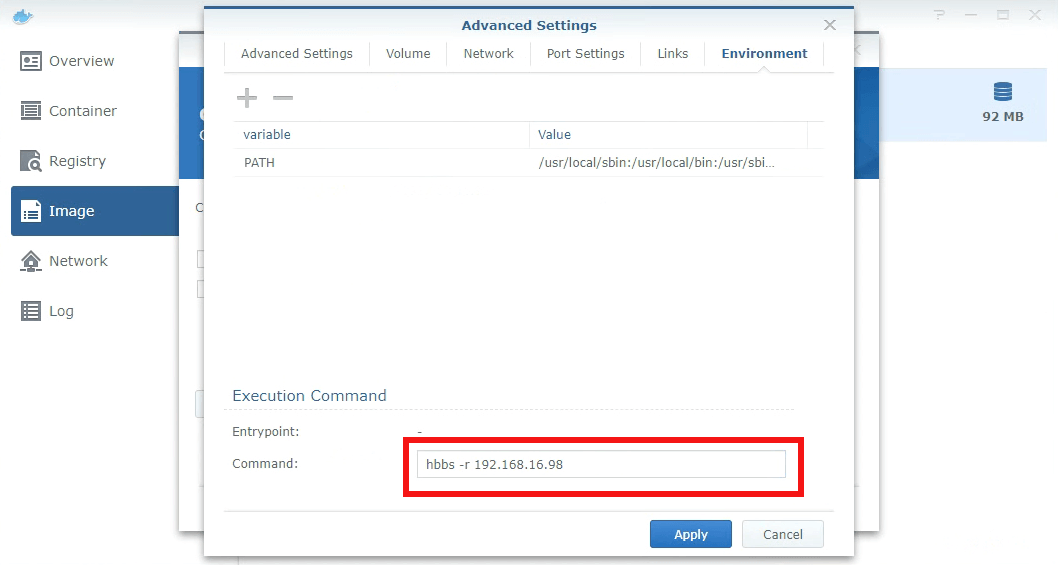
- Set command
Synology’s OS is Debian based, so host net (–net=host) works fine, we do not need to map ports with
-poption.192.168.16.98is an internal IP used here for demonstration only, please set it to a public IP when you deploy (or you can use your DDNS address if you have configured one in “Control Panel → Connectivity → DDNS”) and don’t forget to open ports on your router and your Synology firewall if this is enabled (“Control Panel → Connectivity → Firewall”)!
- Done
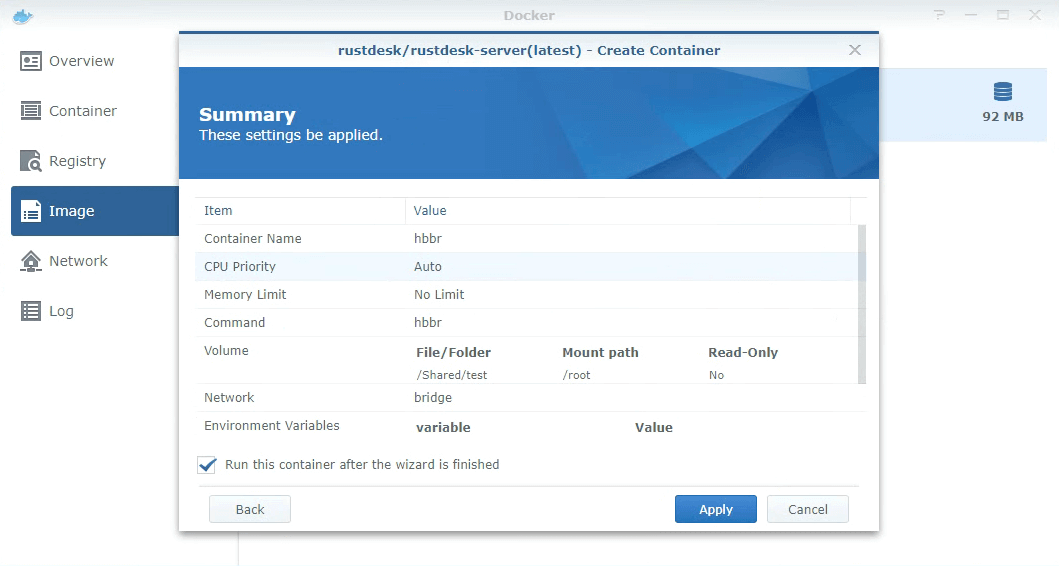
Create hbbr container
Please repeat above hbbs steps, but name the container hbbr and command (for Set Command Step) should be hbbr -k _.
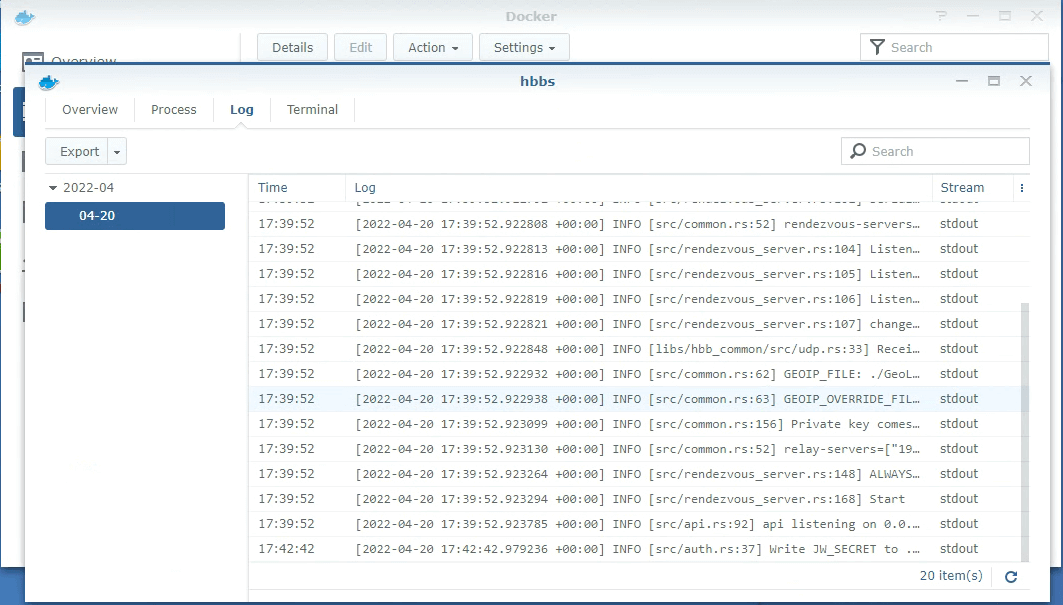
hbbr/hbbs containers
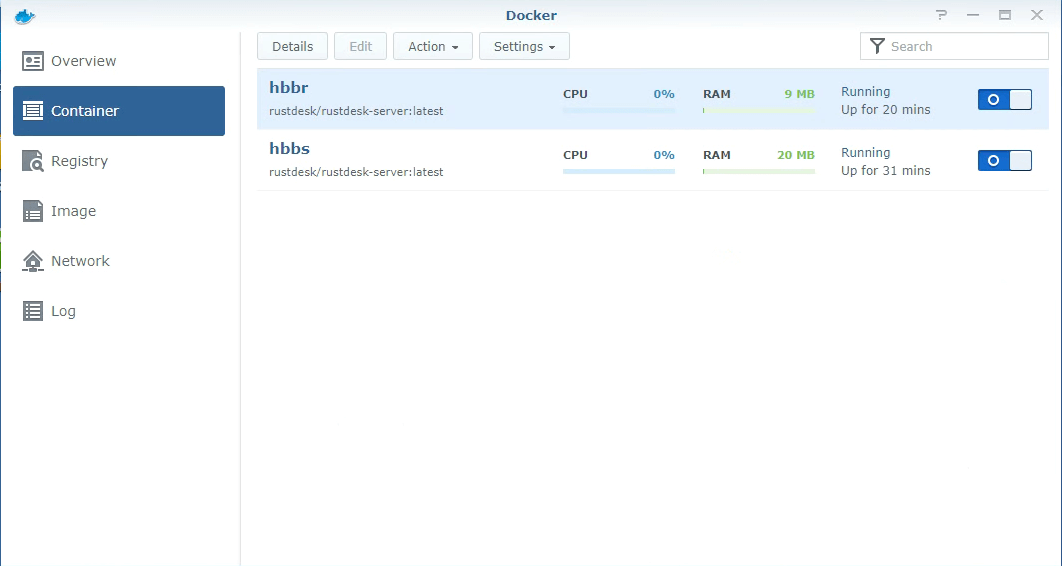
| Double click on container and check log | Double confirm hbbs/hbbr using host network |
|---|---|
 |  |
Retrieve your Key
Browse to the folder setup before using File Station, download id_ed25519.pub and open with a text editor to via your key.