Azure
Use this guide to connect RustDesk Server Pro to Microsoft Entra ID with OpenID Connect.
What does the Azure OIDC setup do?
This setup lets users sign in to RustDesk Server Pro with Microsoft Entra ID accounts by using OpenID Connect. In practice, you register RustDesk as an application in Azure, copy the client credentials into RustDesk Pro, and point RustDesk Pro at your Entra tenant issuer URL.
Azure OIDC checklist
- Open the RustDesk Pro web console through the final callback origin you want to use.
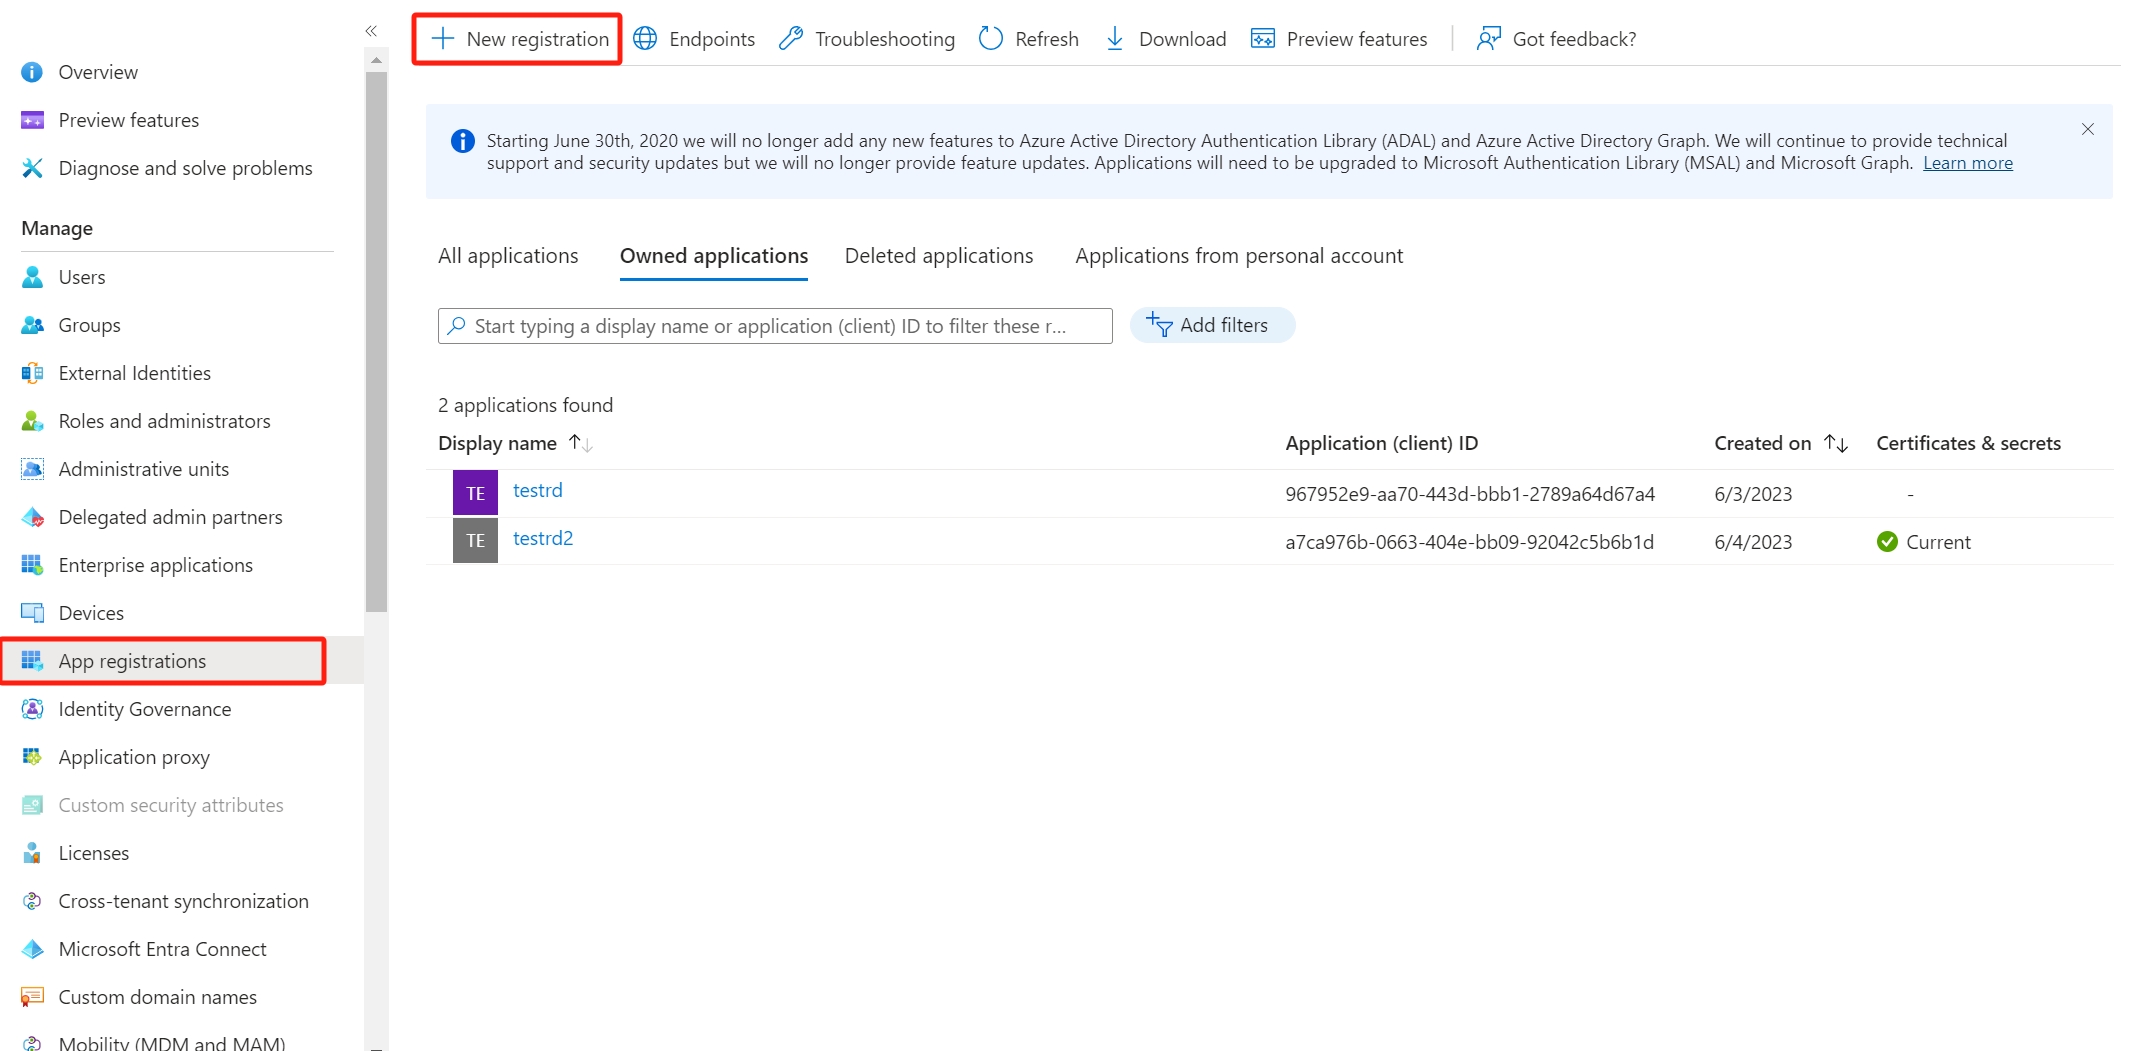
- Create an app registration in Microsoft Entra ID.
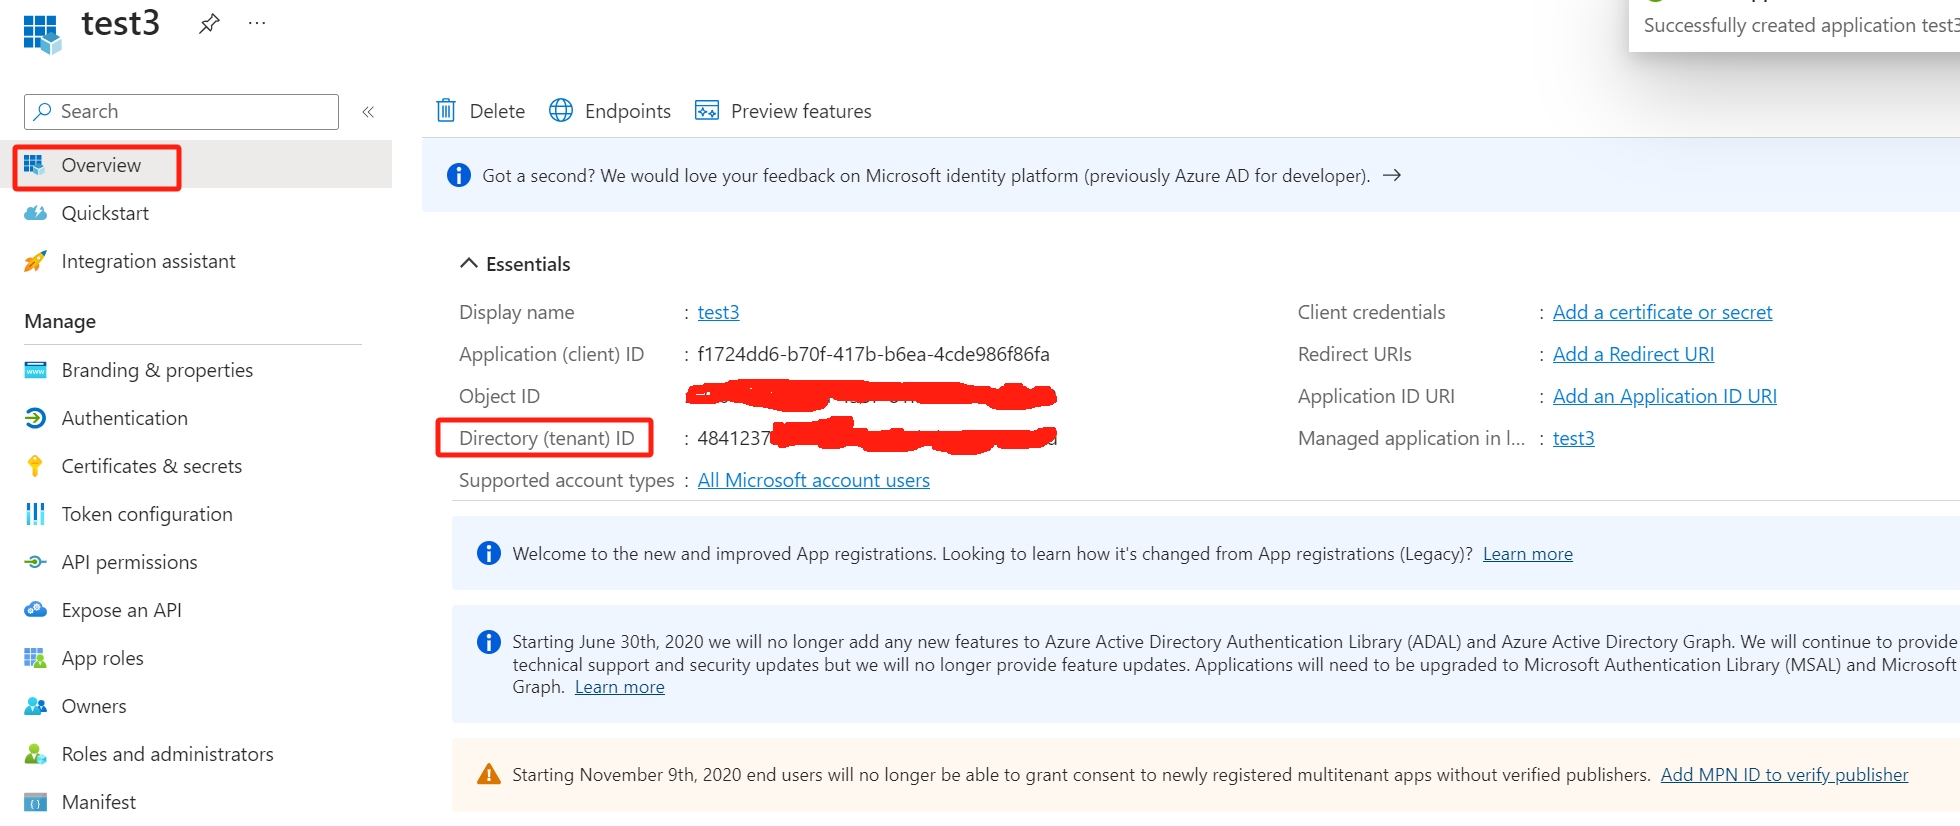
- Copy the
Client IDfrom Azure into RustDesk Pro. - Create a client secret and save the secret value immediately.
- Build the issuer URL with your
Directory (tenant) ID. - Enable
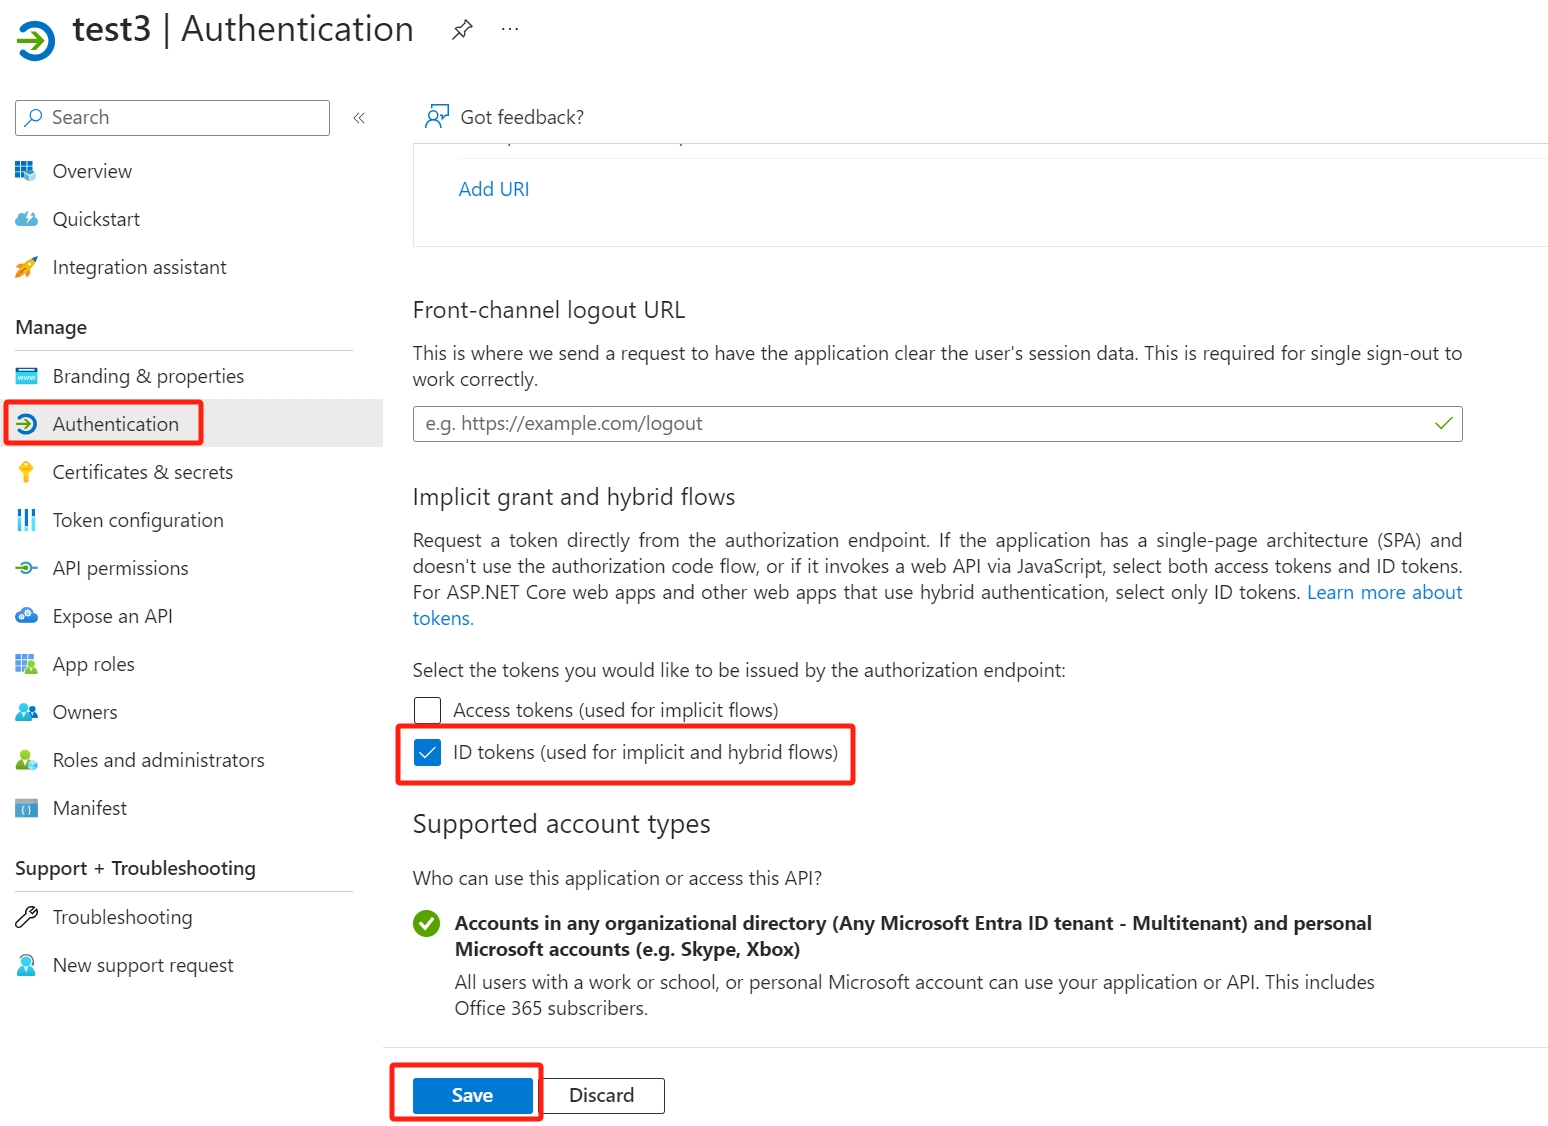
ID tokensin Azure authentication settings.
Which Azure values go into RustDesk Pro?
| RustDesk Pro field | Azure source |
|---|---|
| Callback URL | Copy from the RustDesk Pro OIDC settings page |
| Client ID | Application (client) ID in the Azure app overview |
| Client secret | Secret Value created under Certificates & secrets |
| Issuer | https://login.microsoftonline.com/<Directory (tenant) ID>/v2.0 |
Video tutorial
https://www.youtube.com/watch?v=izGxSmifURI
Configuration
- Sign in to the Azure portal.
- Search for and select Microsoft Entra ID.
- In the left menu, select App registrations, click New registration.
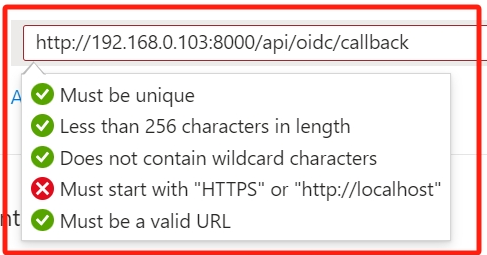
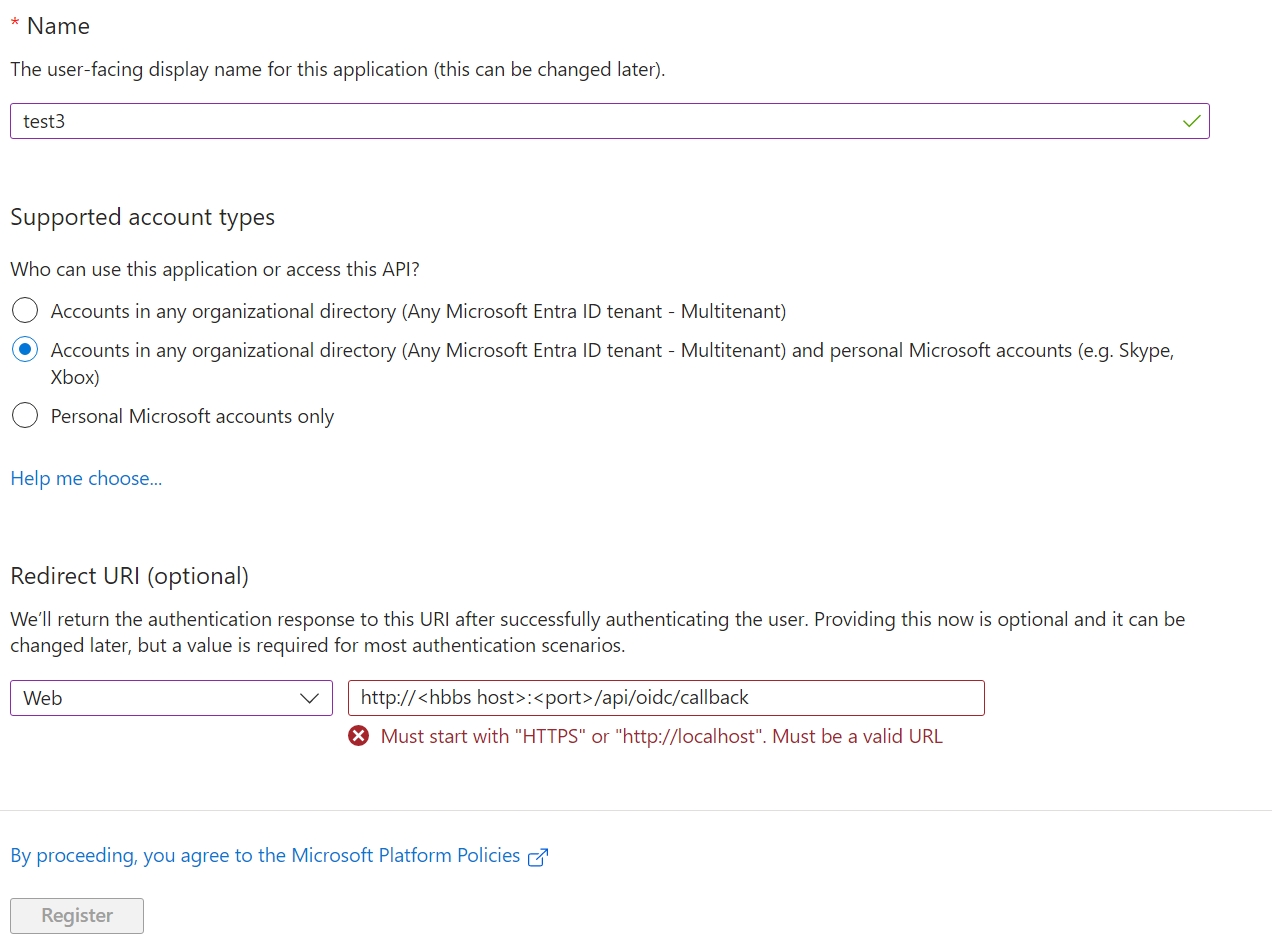
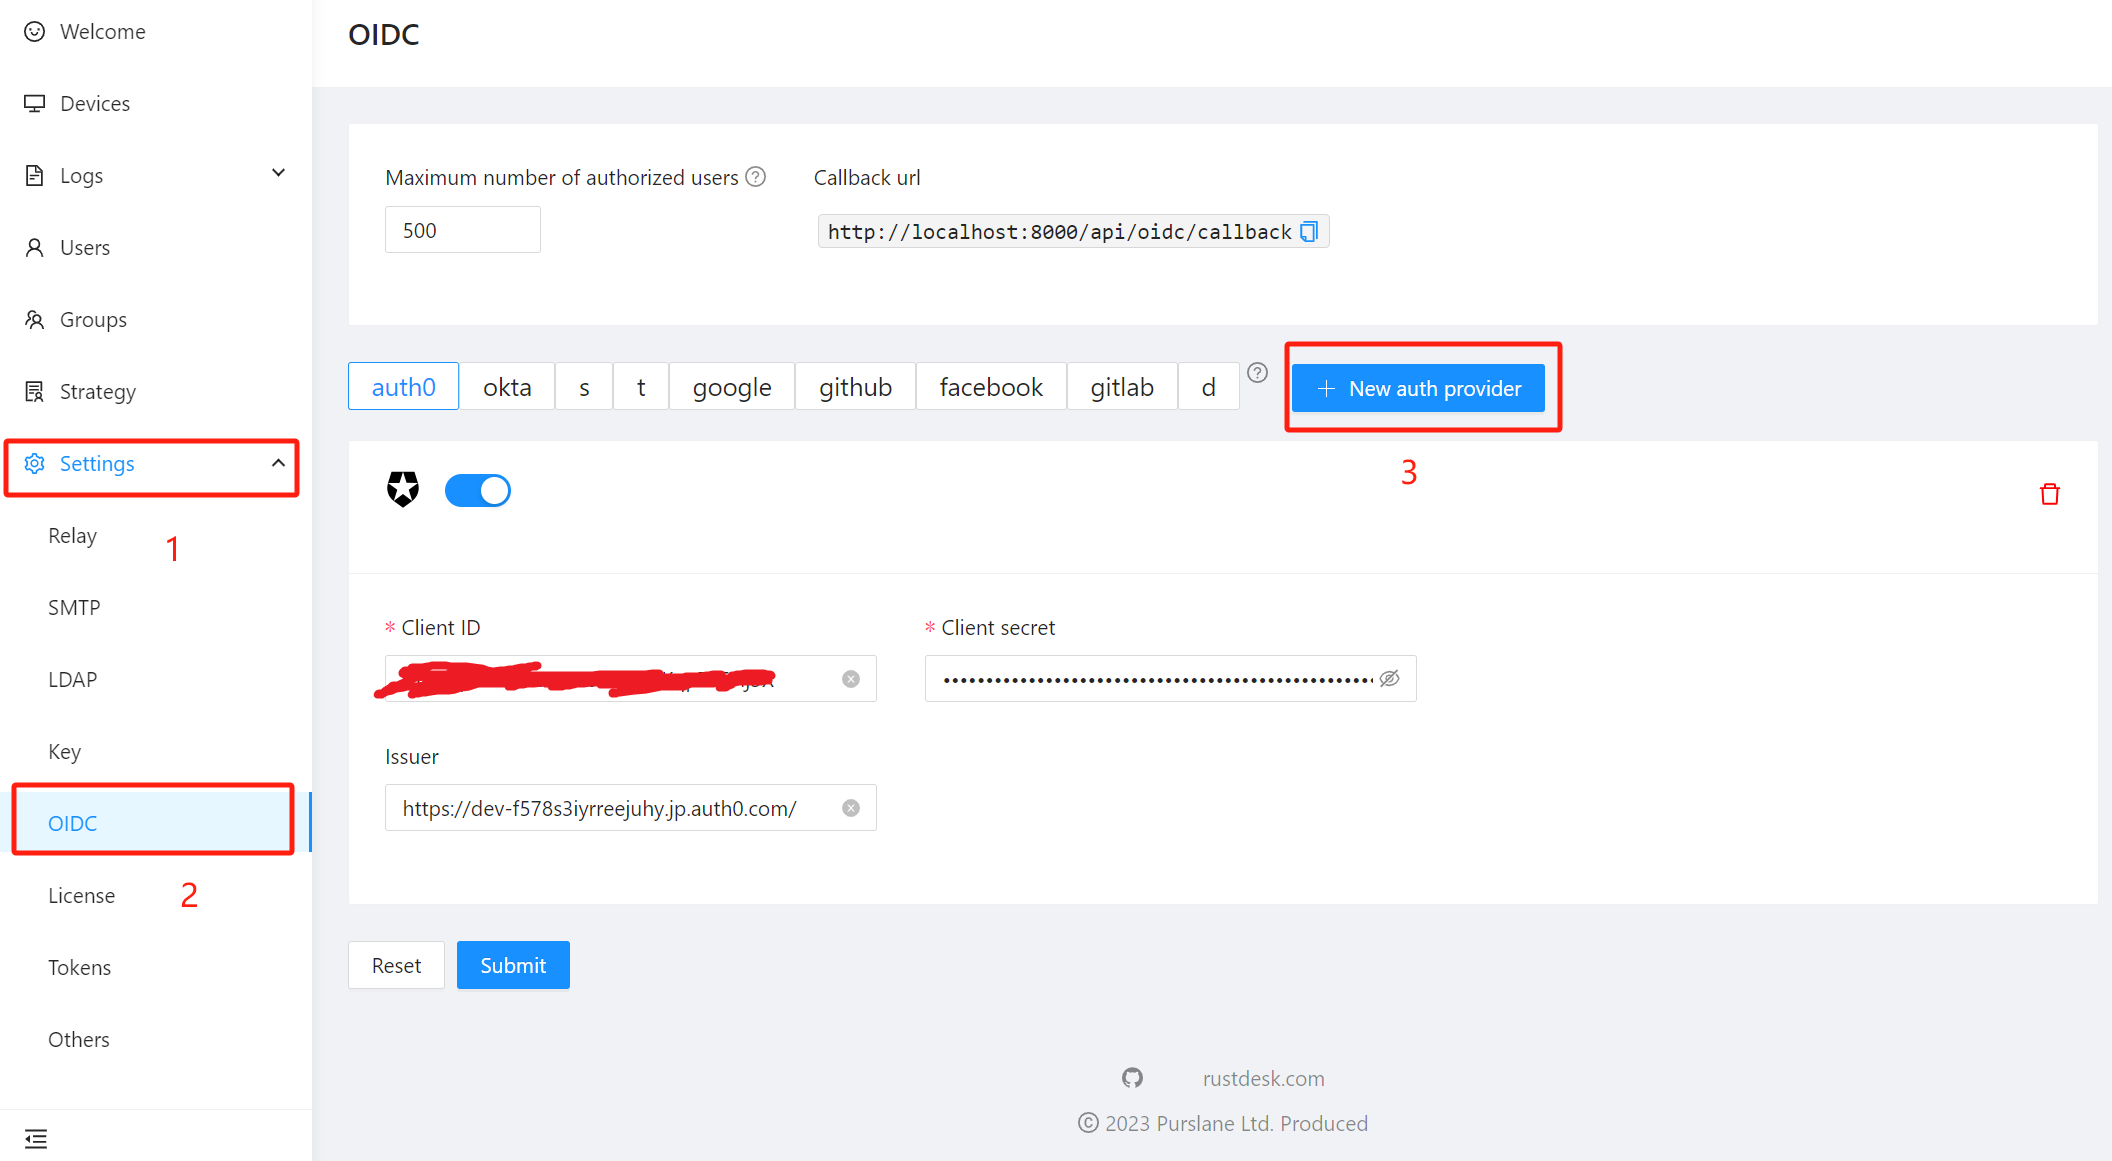
- Open the RustDesk Pro console, in the Settings page, click the OIDC module. Then copy the Callback URL. Note: The Callback URL is not editable, the
Pathpart is fixed toapi/oidc/callback, and theProtocol://Host:Portpart is the origin of the current web page. If you open it through the addresshttp://localhost:8000/<path>, then the Callback URL ishttp://localhost:8000/api/oidc/callback. If you open it through the addresshttps://192.168.0.1:8000/<path>is opened, then the Callback URL ishttps://192.168.0.1:8000/api/oidc/callback. Because Azure must usehttps://orhttp://localhost, please select the appropriate address to open your RustDesk Pro console.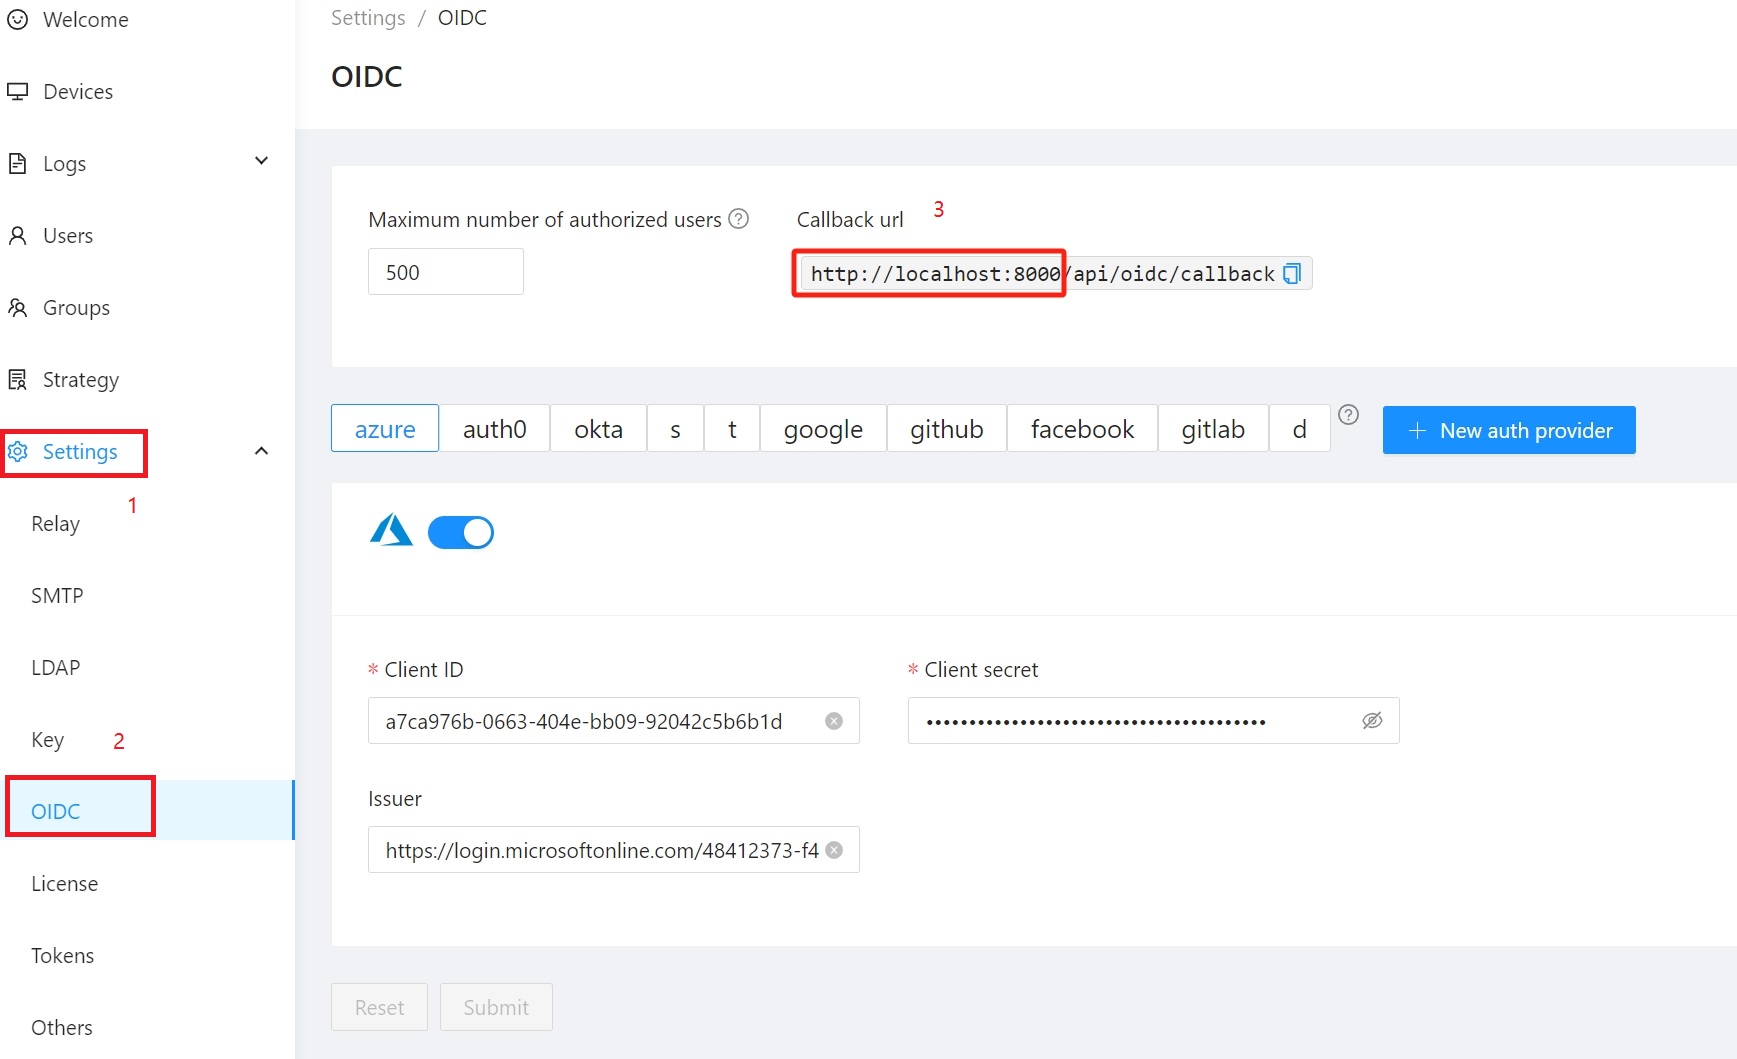
- Input the Name, select the Supported account types, and paste the Redirect URI from RustDesk Pro.
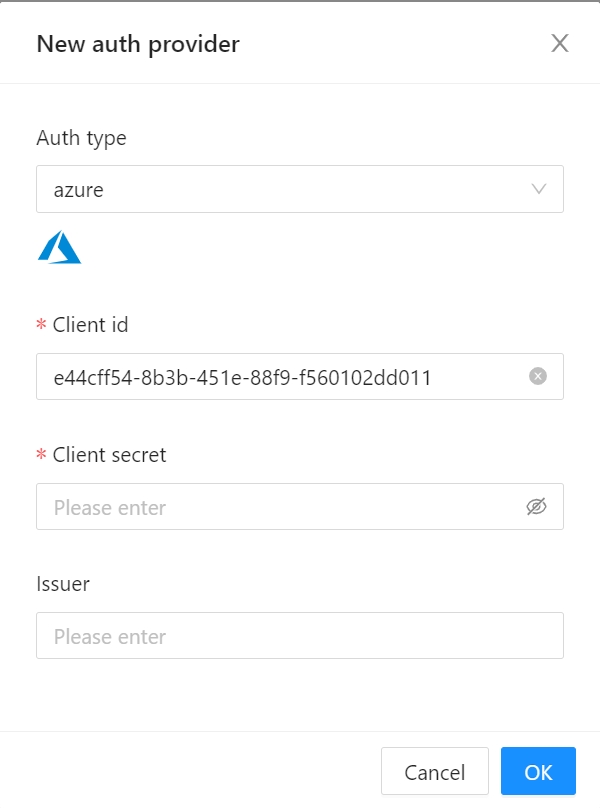
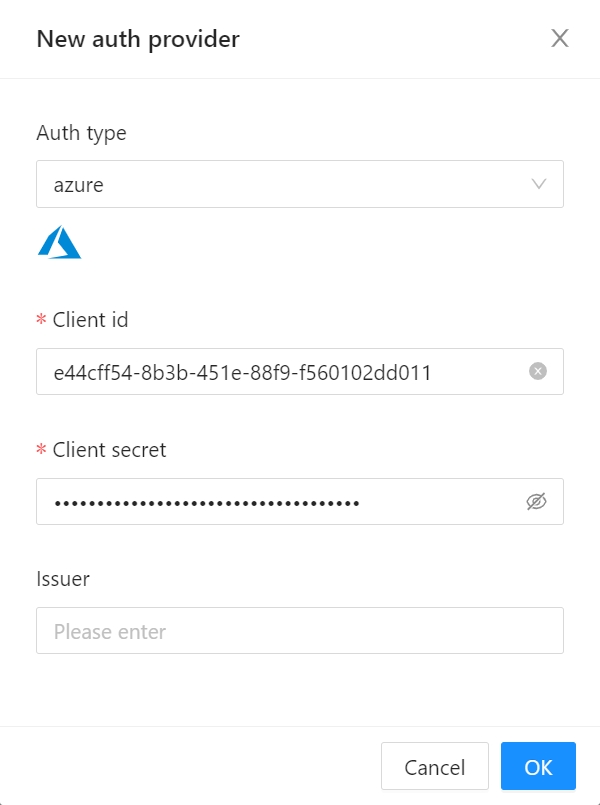
- In RustDesk Pro, click New auth provider.
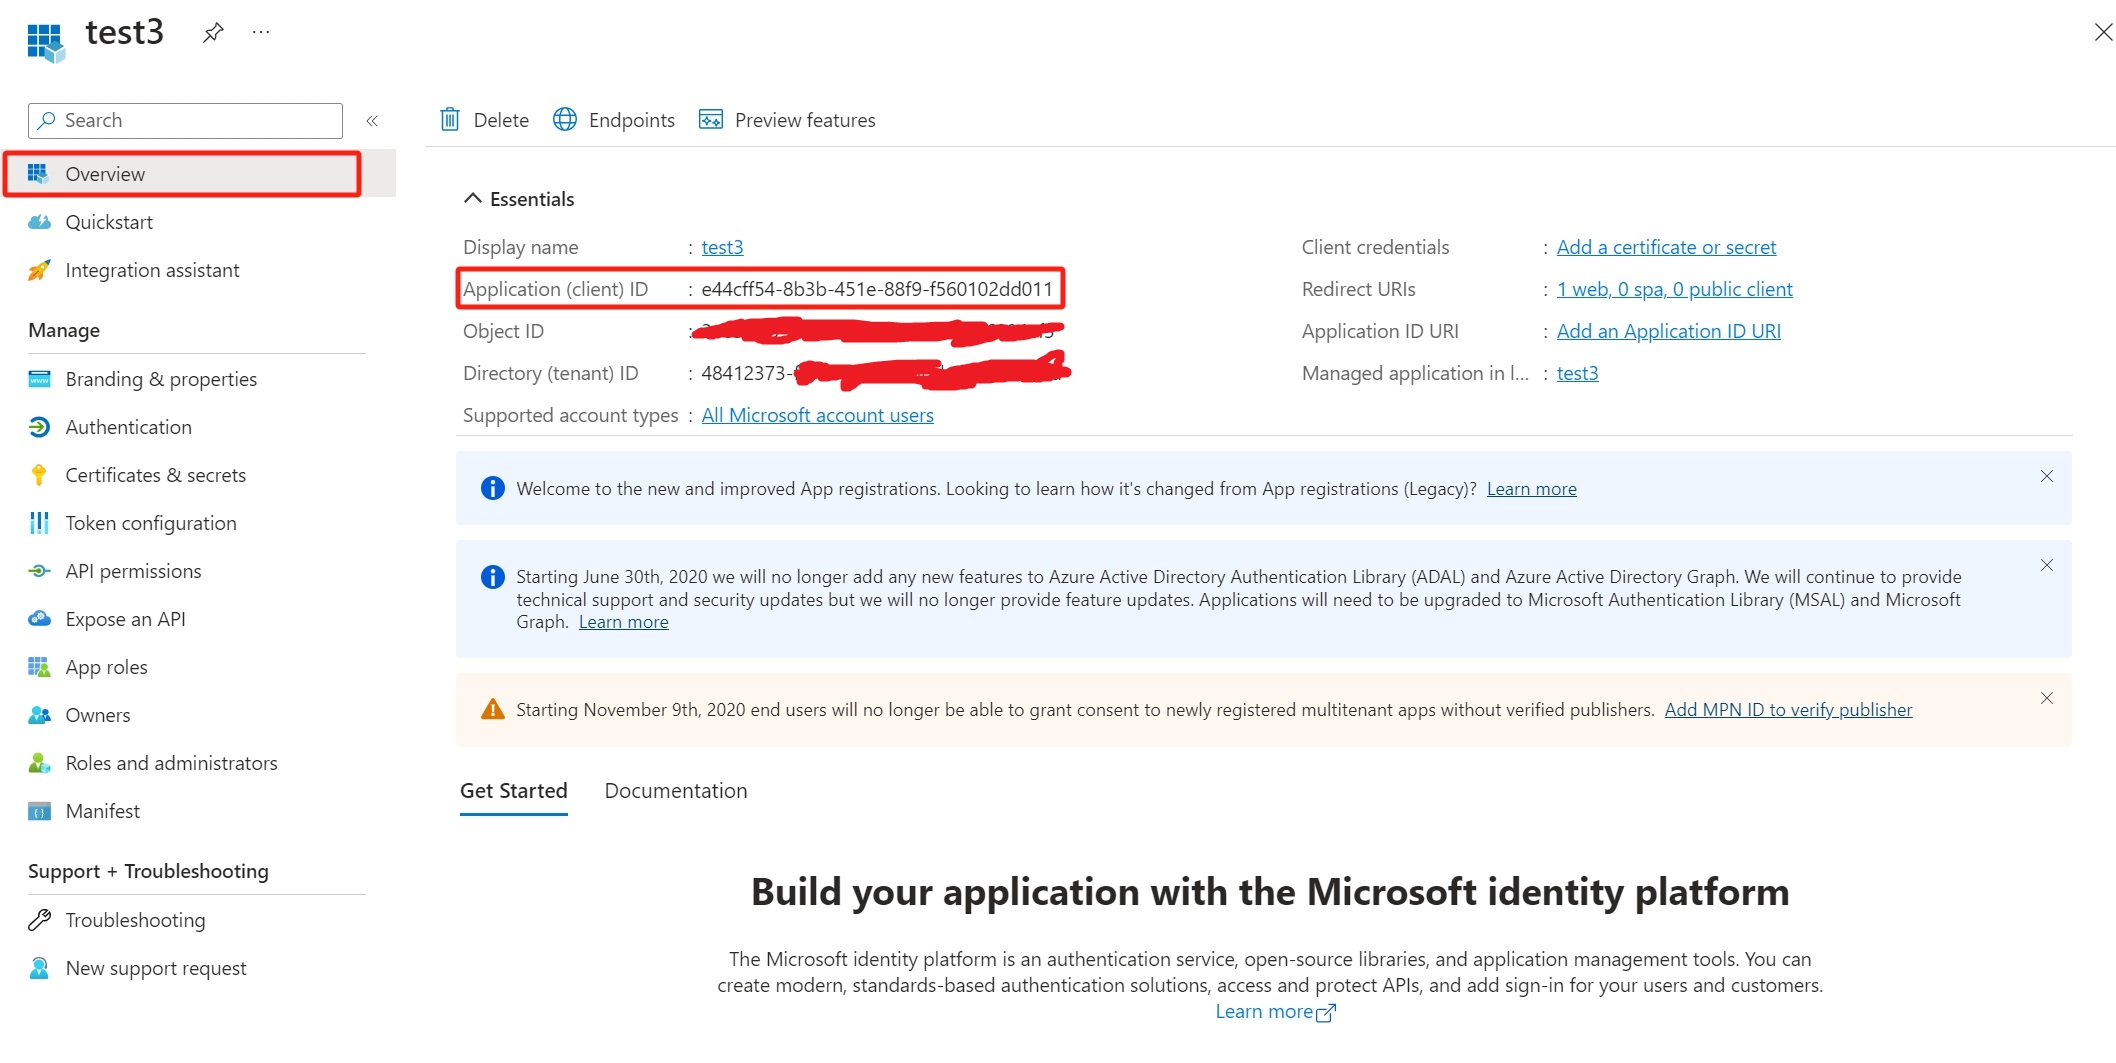
- In Azure, select the application you want to use, click Overview, and copy the Application (client) ID.
- In RustDesk Pro, paste the Client ID.
- In Azure, Certificates & secrets, create a new or select a client secret, usually New.
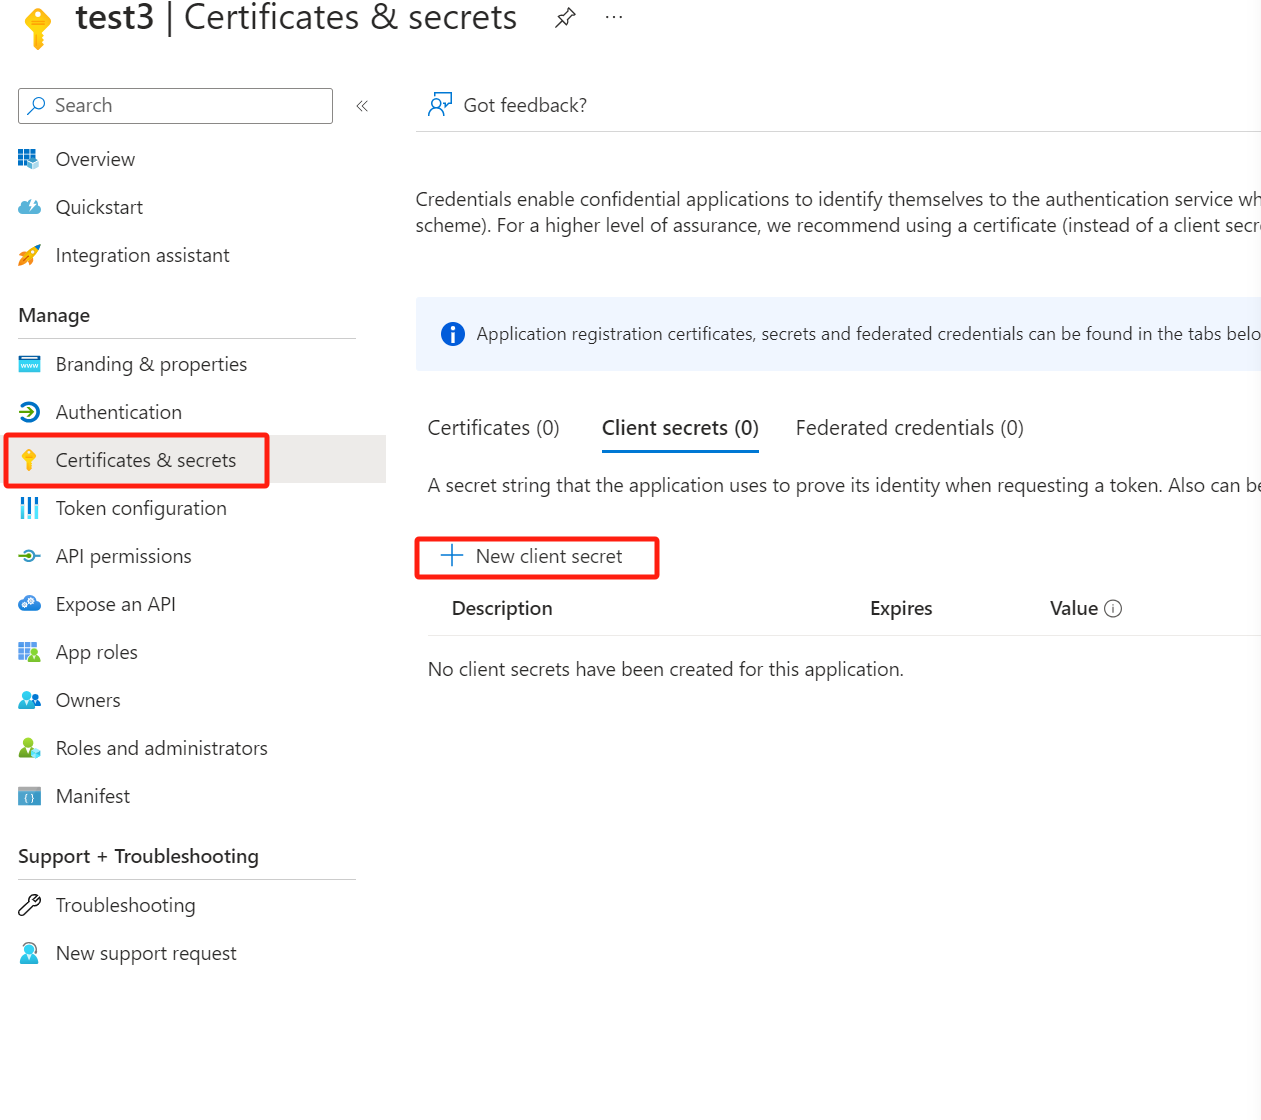
- In Azure, copy the value of the client secret. Note: This value is only visible when you first register. It is no longer visible after you leave the page. Please keep this value properly.
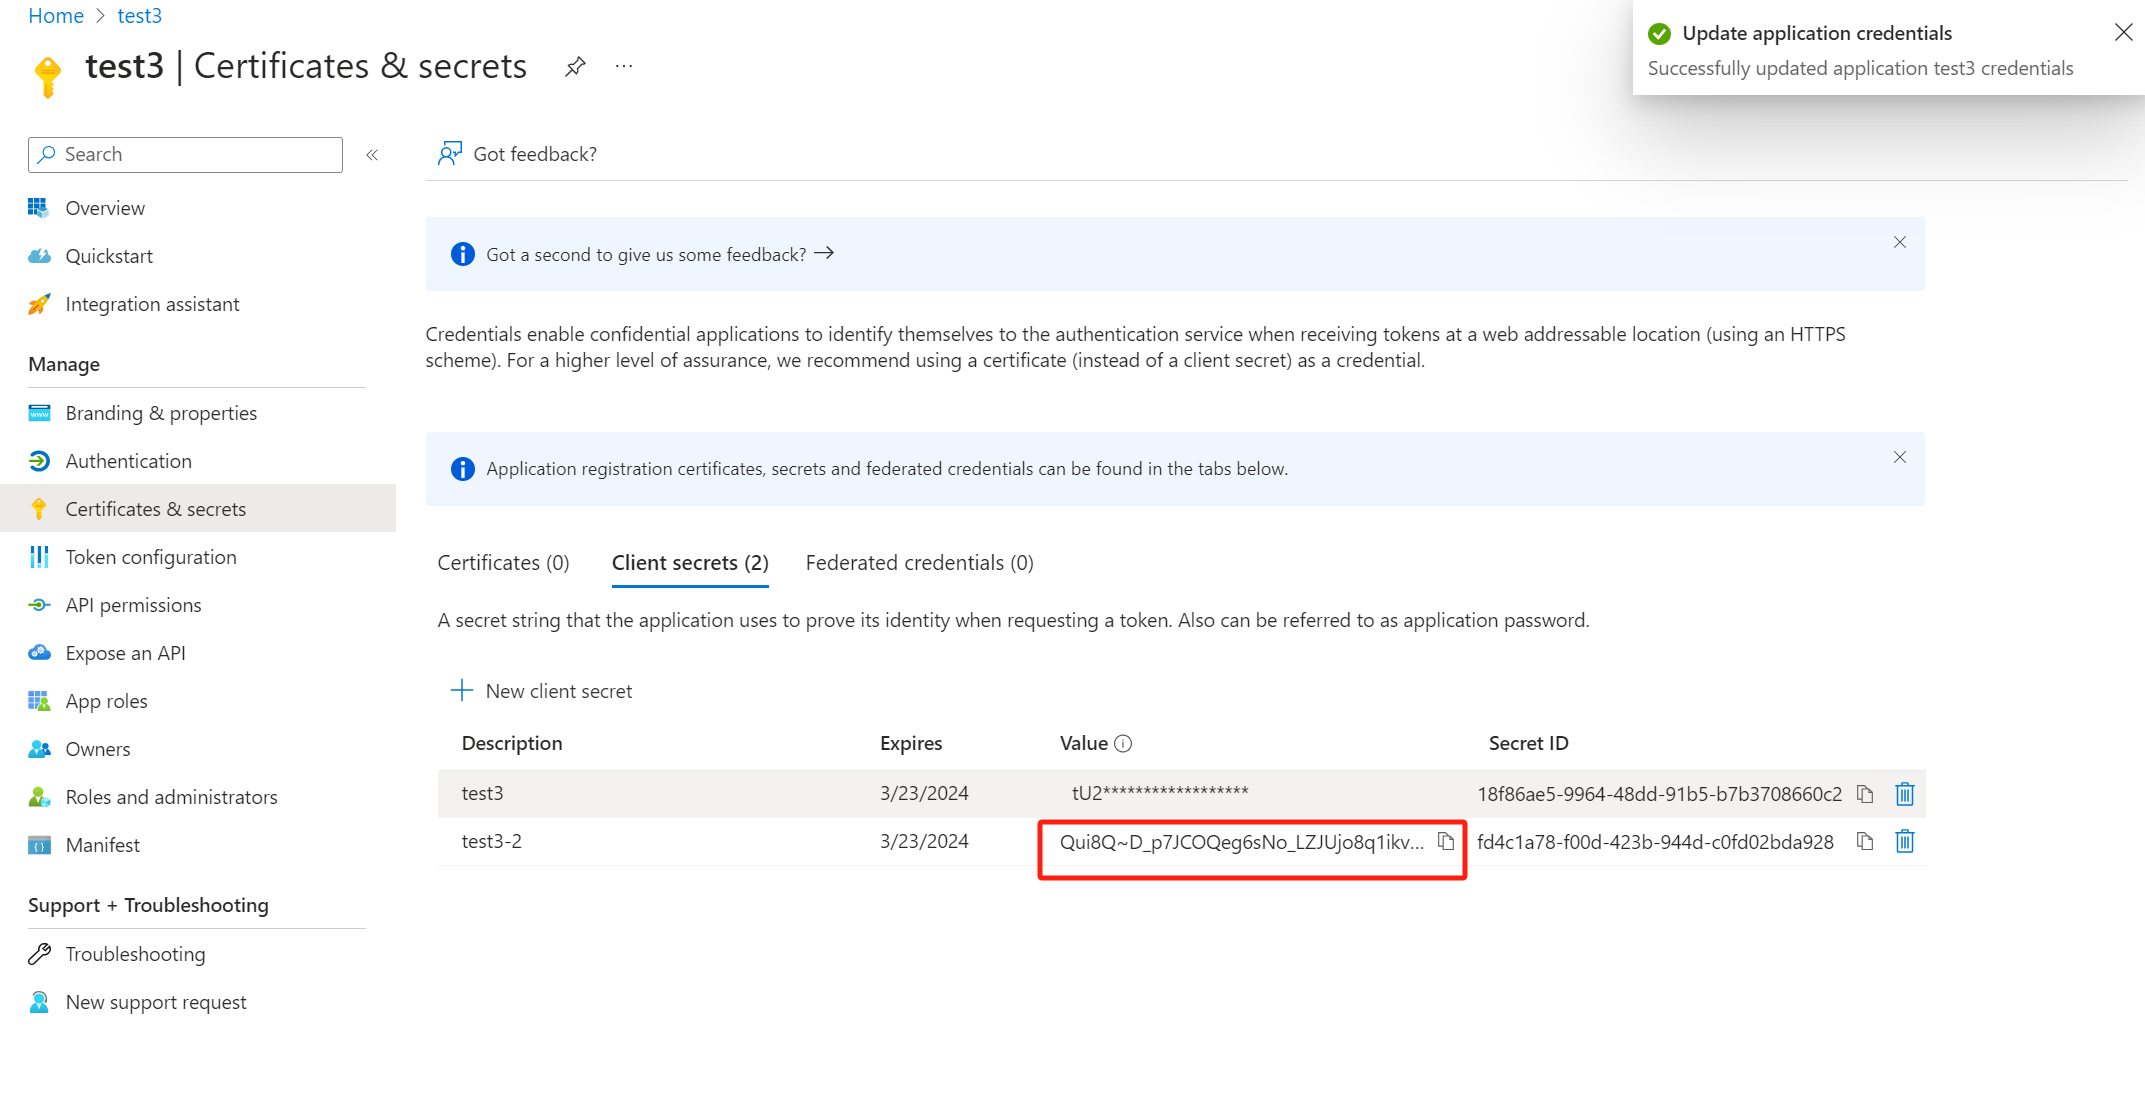
- In RustDesk Pro, paste the value for the client secret.
- In RustDesk Pro, fill in the Issuer field with
https://login.microsoftonline.com/<Directory (tenant) ID>/v2.0. Please replaceDirectory (tenant) IDwith your Directory (tenant) ID. The Directory (tenant) ID is in Azure’s app Overview panel.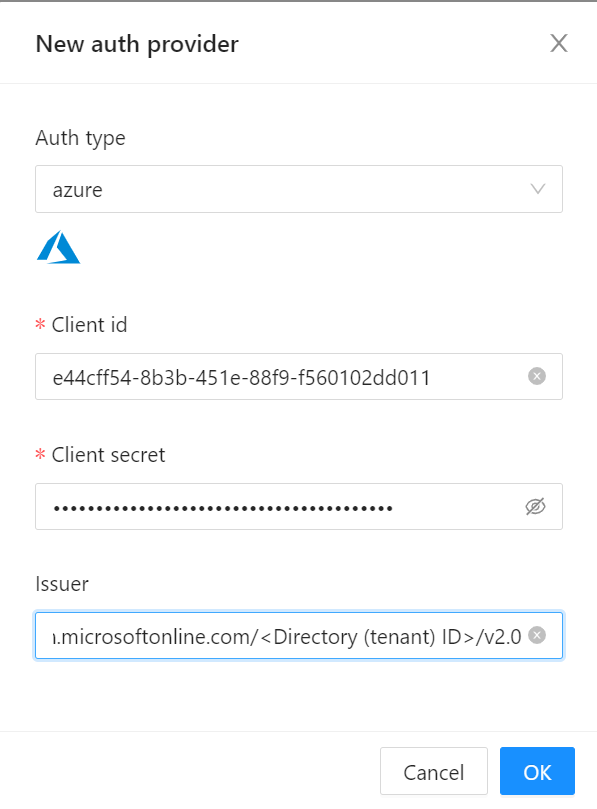
- In Azure, select Authentication menu. Then set up authorization, by choosing ID tokens (used for implicit and hybrid flows).